
Author: Gustavoblalmiras
If you keep getting flashed at night — or you can’t see far enough ahead — your headlights may be aimed too high or too low. The good news: you can usually re-aim them at home with a wall, tape, and a screwdriver (no garage bay needed). In most cases, you’ll mark reference lines on a wall, back up 25 ft (7.6 m), and set the low-beam cutoff slightly below headlight height before fine-tuning left/right.
This is only for educational purposes. This article is general information and doesn’t replace your owner’s manual, local laws, or professional advice. Always prioritize safety: if your lights can’t be aimed without causing glare (or if you’re unsure), have a qualified shop check alignment.
Quick safety warning: Do not attempt this on a slope or uneven ground. Do not stare into high-intensity headlights (HID/LED). If your vehicle has auto-leveling, adaptive headlights, or a “headlamp calibration” requirement, follow the manual—some systems need a scan-tool calibration after suspension changes or headlamp replacement.
Why proper headlight aim matters (and why people flash you)

Headlight aim isn’t cosmetic. It controls two things that matter every night:
- Your seeing distance (how far down the road your low beams actually light).
- Glare to other drivers (how much light hits other people’s eyes and mirrors).
If you’re getting flashed, it usually means one of these is happening:
- Your low beams are aimed too high.
- You have a lift/level kit, heavy rear load, or sagging suspension changing the vehicle angle.
- The wrong bulb type or housing is producing a scattered pattern that looks like high beams.
- A headlight assembly is loose, damaged, or not seated correctly.
IIHS research has linked better headlight visibility ratings with fewer single-vehicle nighttime crashes per mile compared with poor-performing headlights. That’s a strong reason to treat aim as a safety item, not a preference.
Legal note: Some inspections check headlight aim, and mis-aimed headlights can be cited as unsafe equipment. Requirements vary by region—your owner’s manual and local rules are the final authority.
Signs your headlights need adjustment
Most misalignment shows up in the real world before you ever touch a screwdriver. Look for these high-signal signs:
- You keep getting flashed by oncoming drivers even though your high beams are off.
- Short seeing distance: the road looks dim beyond a short patch of light.
- Uneven illumination: one headlight lights higher, lower, or farther than the other.
- Odd beam shape: a blurry cutoff (projectors should be fairly crisp), hot spots pointing up, or light spraying into trees/signs.
- Recent changes: bulb replacement, headlight assembly replacement, collision repair, suspension work, new tires, lift/level kit, or heavy cargo/towing.
Important: If one headlight looks dramatically different from the other, don’t assume it’s “aim.” Check for a loose housing, broken tabs, wrong bulb seating, or moisture inside the assembly first.
Tools and setup (simple kit)
You don’t need specialty equipment. You need repeatability.
- Screwdriver / Torx / socket (depends on your vehicle’s adjusters)
- Tape measure
- Masking tape (painter’s tape works well)
- Level (or a phone level app)
- Marker (optional)
- Cardboard or towel to cover one headlight at a time (optional but helpful)
Before you adjust anything: prep the car so your aim is “real”
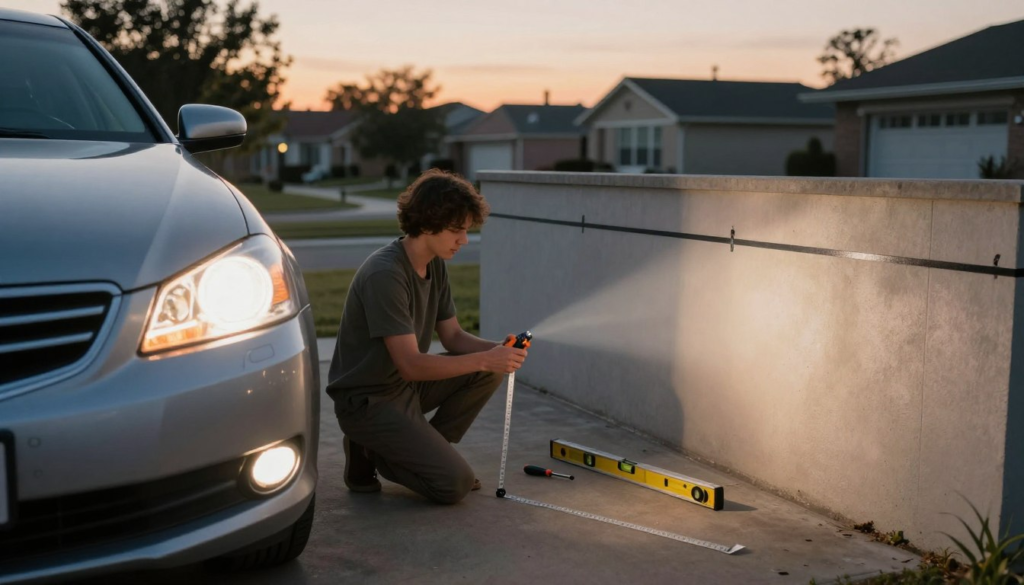
Headlight aim depends on the vehicle’s ride height and angle. If the car is sitting differently than normal, your aim will be wrong as soon as you drive away. Do these checks first:
1) Tire pressure and tire size
Set all tires to the door-jamb sticker pressure (cold tires). Uneven pressure can tilt the vehicle and skew the beam.
2) Fuel level and cargo
Keep fuel near your normal level. Remove unusual heavy cargo from the trunk/bed. If you often drive with tools or equipment, keep the usual load so the aim matches your real driving condition.
3) Suspension and stance check
If the rear is sagging, or the vehicle sits nose-up (lift/level kits), you may need professional correction—or at least aim compensation. A vehicle that points upward will throw the beam upward too.
4) Clean the lenses
Dirt or oxidation can blur the cutoff and reduce useful light. Clean the lenses so you’re aiming a clean beam pattern, not a foggy one.
Choose the right location (this makes or breaks the result)
Pick a spot that meets all three requirements:
- Level ground (no slope). A slight incline can ruin the measurement.
- A flat vertical wall (garage door, building wall).
- Room for 25 ft (7.6 m) of straight backing distance.
Best time is dusk/night so you can clearly see the cutoff. If you must do it in daylight, choose a shaded wall and reduce ambient light as much as possible.
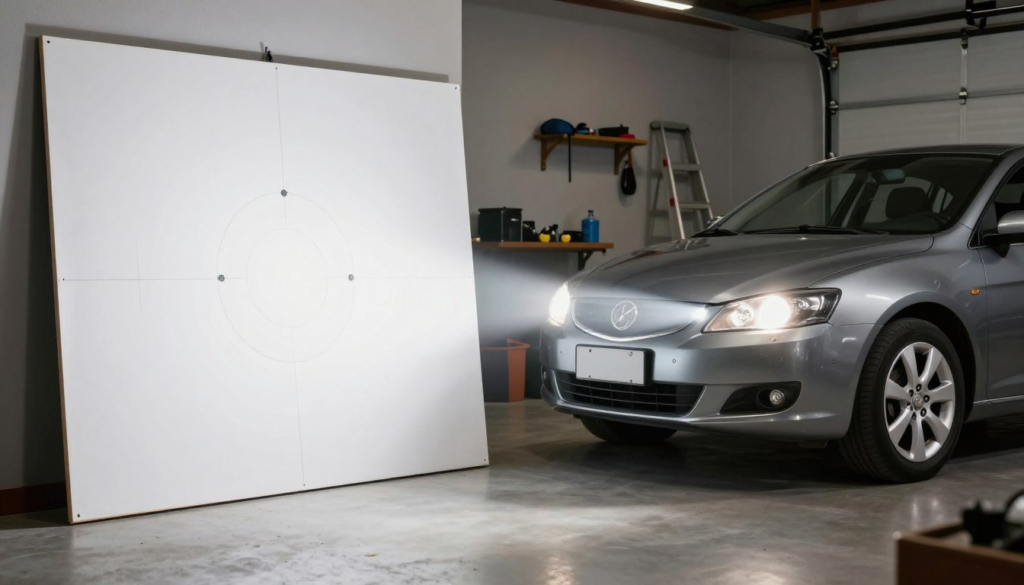
Wall setup: the clean 25 ft method (works for most vehicles)
This method creates reference lines so your adjustment is measurable, not guessy.
Step A: Park close and mark headlight centers
Park the vehicle facing the wall, with the front bumper a couple feet away (close enough to measure easily). Then:
- Measure from the ground to the center of each low-beam projector lens (or the center of the reflector/bulb area if you don’t have projectors).
- Put a small piece of tape on the wall at that height for the left headlight center and the right headlight center.
- Measure the distance between the two headlight centers on the car, and transfer that spacing to the wall so your marks match left and right.
Tip: If you’re unsure where “center” is, use the visible center of the lens/projector bowl as your reference.
Step B: Create a horizontal reference line
Run a long strip of masking tape horizontally across the wall at the measured headlight-center height (connecting both headlight center marks). Use a level (or phone level) so this line is truly horizontal.
Step C: Create two vertical reference lines
Make a vertical tape line at the left headlight center mark and another at the right headlight center mark. You now have a simple “target grid.”
Step D: Back up exactly 25 ft (7.6 m)
Back the car straight back to 25 ft from the wall. Measure from the wall to a consistent point on the vehicle (front axle line is ideal; front bumper can work if you’re consistent). Keep the wheels straight.
About the “drop” below the line: Many owner manuals use a 25 ft procedure and specify aiming the low-beam cutoff slightly below headlight center height at that distance (a small drop). One owner-manual example uses a 25 ft setup and describes a small downward aim—always check your exact manual because some vehicles specify different values depending on headlight type and beam pattern.
How to aim low beams (the part that prevents glare)

Low beams are the priority because they’re what you use around other drivers. High beams are typically fixed relative to the low beam alignment.
1) Turn on low beams and cover one headlight
Cover the passenger-side headlight with cardboard or a towel so you can aim the driver-side beam without the patterns overlapping.
2) Vertical aim: set the cutoff slightly below headlight height
If you have projector headlights, you’ll see a fairly sharp cutoff line. Aim that cutoff so it sits slightly below the horizontal tape line at 25 ft. This helps you see down the road without blasting glare into oncoming traffic.
If you have reflector headlights (less sharp cutoff), use the top edge of the main bright area as your reference, and still aim slightly below the horizontal tape line.
Do not aim the cutoff at or above headlight center height at 25 ft unless your manual explicitly instructs otherwise. That’s a common reason drivers get flashed.
3) Horizontal aim: align the beam with the correct vertical line
Most low beams should point straight ahead, not cross into the opposite lane. Use the vertical tape line for that headlight as your reference. Adjust so the beam’s main hot spot (or the “knee” of the cutoff, depending on pattern) is centered close to that vertical line.
Left-hand drive vs right-hand drive patterns: Some beam patterns have an intentional “step” or “kick-up” that illuminates road signs on the passenger side. That kick-up should be on the passenger side—not blasting into oncoming traffic. If your pattern looks mirrored, you may have the wrong headlight assembly for your market.
4) Repeat for the other headlight
Uncover the passenger-side light, cover the driver-side, and repeat the same process. When both are done, uncover both and verify the beams look even and symmetrical.
Where are the adjustment screws?
Adjustment points vary. Common locations include:
- Top of the headlight housing (often visible from above)
- Behind the housing (accessed from the engine bay)
- Through a small access hole near the radiator support
Best practice: Use your owner’s manual to confirm which adjuster controls vertical vs horizontal. Turn slowly—small turns can make noticeable changes on the wall.
Different headlight types (halogen vs LED vs HID) — what changes?
The aiming concept is the same: control glare, maximize useful distance. What changes is how sharp the cutoff is and how sensitive the beam can be to small adjustments.
Halogen reflectors
These often have a softer cutoff and a broader “hot spot.” Use the top edge of the main bright region as your guide. If the beam looks scattered or messy, confirm the bulb is seated correctly—mis-seated halogen bulbs can mimic “bad aim.”
LED headlights
OEM LED systems can have a crisp cutoff and strong intensity. That’s great for you—and harsh for others if aimed too high. Be conservative and follow the manual. Also: if your car has an LED module and auto-leveling, calibration may be required after repairs.
HID/Xenon
HID beams can be very bright with a sharp cutoff. Handle components carefully and avoid touching bulbs (if serviceable). If an HID beam pattern is uneven or “color flickers” badly, that can be a bulb/ballast issue—not just aim.
Policy/safety note worth publishing: Avoid “drop-in” LED/HID conversions in halogen housings unless the setup is legal and engineered for the housing. Many glare complaints are caused by mismatched bulbs/optics, not aim screws.
Troubleshooting: when aim screws won’t fix the problem
If you aim carefully and still get flashed (or can’t see well), the issue is often mechanical or optical. Here are common causes and what to do next:
| Problem | What it usually means | What to do |
|---|---|---|
| One beam sits much higher than the other | Loose housing, broken mounting tab, bent bracket | Inspect mounts, reseat/repair housing, then re-aim |
| Cutoff is blurry or “splattered” | Oxidized lens, moisture, wrong bulb seating/type | Restore/clean lens, fix moisture, verify correct bulb seated properly |
| You can’t aim low enough | Vehicle nose-up stance (lift/level), sagging rear, wrong assembly | Address suspension/stance, confirm correct assembly, consider professional alignment |
| Pattern looks mirrored (kick-up wrong side) | Wrong-market headlamp (LHD vs RHD) | Verify correct headlamp for your region |
| Beam wanders over bumps | Loose headlight, worn suspension, headlamp leveling fault | Check fasteners/suspension; scan/calibrate if applicable |
Verify your results (wall check + road check)
1) Wall verification
With both low beams on at 25 ft:
- The cutoffs should be even left-to-right (one slightly higher is a red flag).
- The pattern should be stable and not “spray” far above the cutoff.
- The beams should be centered reasonably to their vertical reference lines (not crossing into opposing space).
2) Road test (the “real world” proof)
Pick a dark, safe road. With low beams:
- You should see a clearer, longer usable light pattern without feeling like you’re driving “into darkness.”
- Signs should illuminate without your beam blasting into trees.
- You should stop getting flashed—if you still do, re-check stance, bulb type, housing condition, and aim height.
When to stop DIY and get help: if adjusters are seized, housings are damaged, you can’t achieve an even cutoff, or your vehicle requires calibration for adaptive/auto-leveling systems.
FAQ
1) What’s the correct distance for aiming headlights at home?
25 ft (7.6 m) is a very common owner-manual aiming distance. Some manuals specify different distances or procedures, so treat your manual as the final rule.
2) How low should the low-beam cutoff be at 25 ft?
Many procedures aim the low-beam cutoff slightly below headlamp-center height at 25 ft to reduce glare. The exact drop varies by vehicle and headlamp type, so check your owner’s manual and follow its specification if it differs.
3) Why do people flash me even after I adjusted the lights?
Common reasons are: the vehicle is sitting nose-up (lift/level, heavy rear load, suspension sag), the wrong bulb is installed or not seated correctly, the headlamp housing is wrong/damaged, or the lens is cloudy and scattering light. Aim fixes “angle,” but it can’t fix a scattered beam pattern.
4) Can LED/HID conversions affect aim and glare?
Yes. Even a perfectly aimed headlight can glare if the bulb/optic combination is not designed for the housing. If your light pattern looks messy or has lots of upward scatter, investigate bulb type, legality, seating, and housing compatibility before chasing aim.
5) When should I pay a shop to aim them?
Pay a shop if: you can’t get an even cutoff, your adjusters are stuck, you suspect a bent bracket/collision damage, you have adaptive/auto-leveling headlights that need calibration, or you’ve changed suspension height and want a precise, compliant setup.
Conclusion
Proper headlight aim is one of the fastest “safety upgrades” you can do at home. Use a level surface, a wall, and the 25 ft (7.6 m) method to create repeatable reference lines. Aim low beams so the cutoff sits slightly below headlight-center height, then fine-tune left/right so the beam stays in your lane and doesn’t create glare.
After adjustment, do a short road test. You should see better distance lighting without getting flashed. If you still get flashed or the beam looks scattered, don’t keep cranking adjusters—inspect bulb type/seating, lens clarity, housing mounts, and vehicle stance, or have a professional aim it. Better visibility is not just comfort—it’s safety.
Source links
Owner manual aiming baseline example (25 ft procedure + reference guidance):
https://www.fordservicecontent.com/Ford_Content/vdirsnet/OwnerManual/Home/Content?variantid=6227&languageCode=en&countryCode=USA&Uid=G2068970&ProcUid=G1759002&userMarket=USA&div=f&vFilteringEnabled=False
IIHS research on headlight visibility and nighttime crashes (bibliography document):
https://www.iihs.org/api/datastoredocument/bibliography/2347